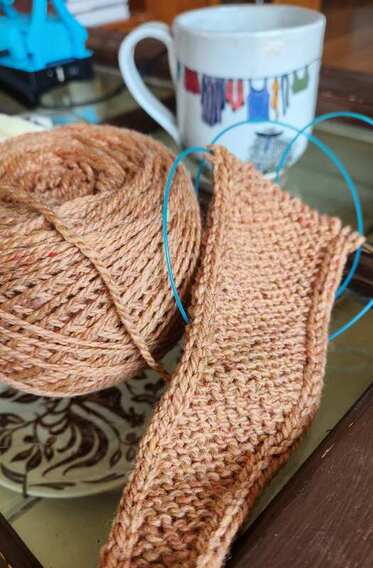
  I just had to cast-on the Sophie Scarf by PetiteKnits this week and after deciding to change my needle size it got me to thinking about drape and how to get the drape of your dreams. We've all been there, worked up that project we thought we were going to love only to have the finished item not look quite like the pattern picture. Often times when we picked out our yarn we didn't take into account how that yarn would drape. So here are my 2 tips for dreamy drape:
Head to my website to join my email list for more great tips and to shop local yarns and hand spinning fibers. ewethfulfiberfarm.com
1 Comment
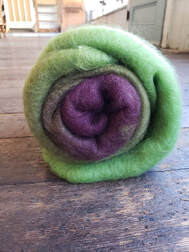 Fun With Batts! Wool batts that is! I've had a lot of handspinners over the years mention to me that they have never spun from a batt and are intimidated by them. So I thought I would do a little step-by-step for those of you who are interested but haven't taken the dive yet. Step 1: Unroll/unfold your batt. Please note, not all batts are packaged the same, but I think the majority of batts you purchase will likely be rolled in some form for ease of packaging.  Step 2: Stripping Batts. I generally strip my batts as I go along so I don't have to hold a big old batt. This is simple! Just pull a chunk and "go with the grain" of the fiber as you pull. You can make this strip as thick or as thin as you want - and your strips do not all need to be the same thickness so do not worry too much as you strip. Depending on the density of the fiber you may want to pre-draft the strip a little for ease of spinning. Totally up to you! 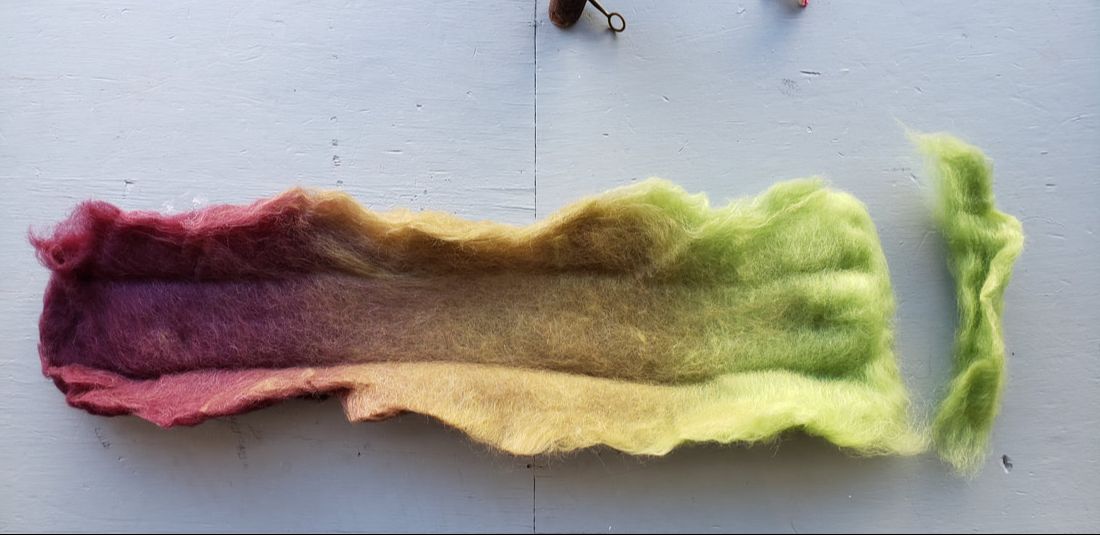 Step 3: Deciding how to spin - shorter or long color changes. Now you have options! Spinning for long color changes. You could choose to spin directly across the batt and follow the colors as they change. The will give you 3 very long stretches of the colors in your yarn, For this batt you would go light green to olive green to the wine color (or you could of course start on the wine side). Spinning this batt in this style would give you long runs of each color. Spinning for shorter color changes. Another option is to split the colors up and spin them back and forth - small strip of light green, then olive green, then wine and back to light green and so on. Spinning in this way will cause more frequent color changes throughout your yarn. If you choose this route, you will want to split the batt into the three different colors and then pull strips from each as you go. You can come up with any combination you'd like! This is your yarn! 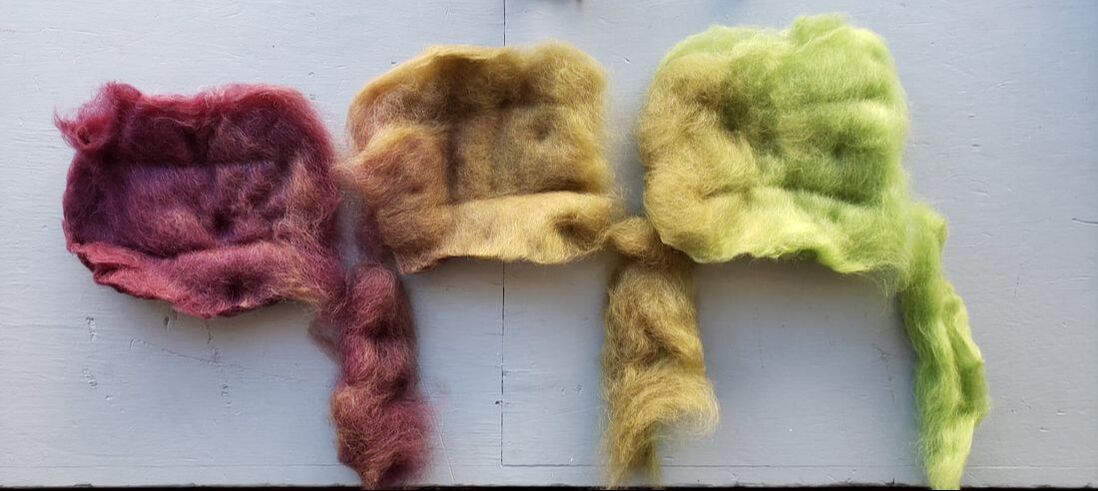 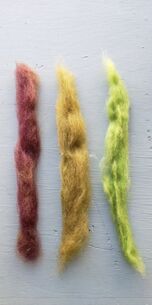 Again, depending on the density of the fiber you may want to pre-draft the strips a little for ease of spinning.
That is two fun ways to spin this batt. And of course there are different ways you could ply that would allow for all different types of color patterns in your finished yarn. I hope this helped a few of you feel a new inspiration towards spinning batts! If you are looking for some lovely batts to spin be sure to check out my online shop for hand spinning fun. ewethfulfiberfarm.com  Have you ever been sitting in a knitting group stitching away when you notice someone clipping along and knitting in a very different style than you? This is how I first learned about continental knitting. A woman in a knit group was cruising through her project and she didn't even seem to be moving her hands. Turns out she was knitting continental style! What's the difference? Continental knitting uses your left hand as the one that handles the working yarn. The forefinger holds the yarn very close to the needle and in essence you are picking up the stitch, knitting the stitch and then sliding the new stitch off the needle in one small smooth movement. This as opposed to English knitting, or "throwing" as I will refer to it moving forward, in which you are using your right hand to handle the working yarn and you are "throwing" the yarn over the needle before you even get to work the knit stitch. Here are 5 great reasons to add continental knitting to your skillset: 1. Faster. This is a biggie! Continental knitting is significantly faster than throwing. The reason being that there is less action taking place. Continental is a quick pick up and slide whereas throwing takes a wrapping motion, then the stitch, then the removal of the stitch. Now most of us aren't trying to run a marathon with our knitting but it doesn't hurt to be a little faster - quicker to get to the next cast on! 2. Ergonomics. Being able to use both hands to knit allows you to reduce overuse by switching between hands with different projects. Please note that I say "different" projects. You always want to pick one way and stick with it through a project as your gauge will likely be very different with the different techniques. Tip: Write notes on each pattern to remind yourself which style you were knitting just in case you put it aside and forget. 3. Left handed. Continental knitting uses the left hand as the dominant hand so if you are naturally a left handed person this technique will be much more intuitive than "throwing" your yarn. 4. Colorwork. Being able to knit with both hands is a game changer for knitting stranded colorwork. If you are a thrower you have to keep putting your yarn down and to switch colors. If you are able to knit with both hands you can have a color in each hand and go back and forth without stopping for color changes! 5. More Consistent Tension and gauge. The idea with continental knitting is that there is very little space between your forefinger and the needle which not only makes knitting faster it also leads to a more consistent tension that is created more by the needle than it is by you and the yarn. If the needles are determining tension vs. you the human, you will undoubtedly get more consistent gauge. There you have it! A little of the what and why's to knitting continental. Are you ready to learn?  I recently posted a video on Instagram of me conditioning some clean picked wool prior to starting to card the wool. This post garnered a lot of questions about why I do this and what the conditioner I use is. I thought I would dive in a little deeper here.
First the why? When processing wool static can start to build up between the fibers. This static will cause issues during carding (and spinning) and not allow the fibers to process as well. During the dry summer and winter days this becomes more of an issue. Conditioning the fiber is a way to combat that static. In addition it adds a little moisture back into the wool just like when we condition our own hair. Now the what? At the mill I use a specific type of commercially processed conditioner. Have no fear, prior to owning the mill I did condition my fibers as need and wanted to let you know you can do this as well. I scoured (no pun intended) through all of my wool books and confirmed that the easiest at home recipe for carding oil is a 50/50 ratio of olive oil and water. Mix it up and add to a spray bottle so you have it on hand. Give it a good shake before you start to use it each time and be sure to have the nozzle set to mist. And finally the how? My best advice is to play with the conditioning oil as needed. If it is a dry season you may want to automatically condition the wool prior to starting to card or comb it. You can do this by having your squirt bottle on the mist setting and lightly misting the wool. I generally fluff the wool a bit after spraying to disperse the oil. Then let is sit for an hour or so to absorb. The wool will absorb the oil! Then resume processing. You can also lightly mist as you go along. The only issue with that is that the wool may feel a little damp. My best advice is make the mix up and do some experimenting to see what will work well in your climate! |
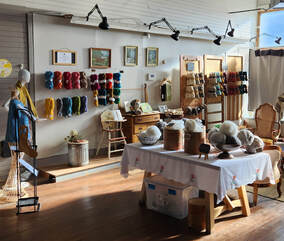
AuthorI am Kim Biegler, the owner and operator of Ewethful Fiber Farm & Mill. I create hand spinning fibers from locally sourced wool and teach others online how to hand spin their own yarn. Archives
August 2023
Categories |
 RSS Feed