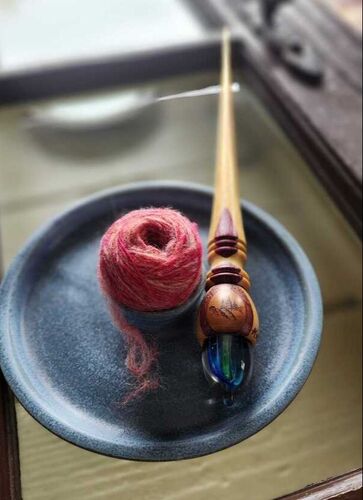
 You know those "aha" moments when you are learning a new craft? They seem life changing at the moment but with proficiency those moments fade. Well I am in the midst of learning to spin yarn on a supported spindle and having those aha moments left and right. While I am not an expert at this craft yet, I wanted to share the top learning moments with you while they are fresh in my mind.
I did a recent YouTube episode on learning this craft and it also has videos of me spinning along the way. To view this episode click the video below!
0 Comments
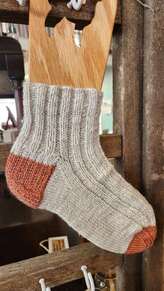 I cast on a new pair of socks (randomly) at the same time that I have been restocking the Prineville roving I designed with socks in mind! It got me to thinking maybe it's time to share some tips for handspinning sock yarn. Here are some of my top tips learned through the years:
And here is a bonus idea you can try. In a recent Zoom meet-up Jodi told us that at her local guild meeting a member mentioned that if you spin 2 of your singles in one direction and the 3rd in the opposite direction, it can make for a longer lasting sock yarn. Jodi managed to find this idea in Sarah Anderson's The Book of Yarn Designs. Example: spin 2 singles in standard Z twist (clockwise) and the 3rd single spin S twist (counterclockwise), then ply as you usually would (in this case S or counterclockwise)! Has anyone tried this? I'd love to hear your thoughts! Thanks for sharing Jodi! If you loved these tips be sure you are signed up for my newsletter where you get early notice on new products plus plenty of spinning and knitting tips! Head to my website to sign up and to shop the above mentioned Prineville fiber... great for spinning socks! 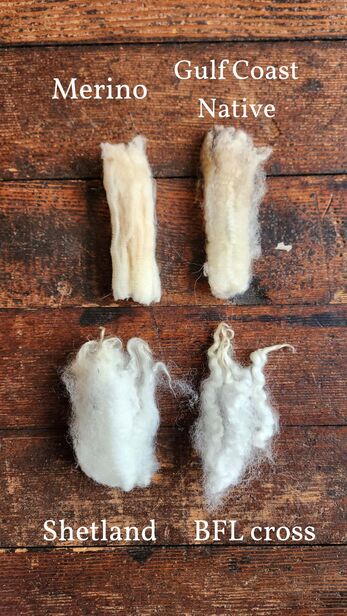 I work with a lot of different breeds of sheep wool here at the mill. Lately I have been busy washing and carding up different breeds of natural white wools. I kept a sample of their locks for comparison and wanted to share a bit about each of the pictured breeds as they apply to handspinners. 1. Merino. The most well known of all the sheep breeds. Merino has a wonderful crimp making it a very bouncy yarn. Plus it is one of the finest of wools making it comfortable to wear next to skin. For handspinning I would recommend waiting a bit to spin this merino wool. It can be extra slick to spin (meaning it will slip through your hands quickly) and often has a shorter staple length so is not the easiest breed to learn on. 2. Gulf Coast Native. This breed is often found in southeast US states among other places and is currently registered as a critically endangered breed by the American Livestocks Breed Conservancy. It is a lovely wool, often overlooked and not always easy to find. The handle is going to vary from next to skin soft to better for outerwear or mittens and hats. The staple length averages a lovely 3-4 inches which is a great length for beginning handspinners. 3. Shetland. I am a bit biased about Shetland as I have my own small flock. That said this is a wonderful and versatile breed. The wool tends to fluctuate wildly depending on what the breeder is breeding for. There are single coated Shetlands whose wool tends to be on the finer end and often is better for next to skin wear. There are also the traditional double coated Shetlands. They often have very fine parts to their fleece and other more coarse parts. Shetland fiber tends to spin wonderfully making it a nice beginner fiber for handspinners. And it comes in a wide variety of natural colors! 4. Wool cross breeds. Sheep that are a cross of different breeds of sheep can have some of the most beautiful fiber, especially if they are being bred for wool. Generally these shepherds are taking the best attributes of the different breeds wool types and aiming for the best. An example is the above pictured Blue Faced Leicester/Shetland cross. The BFL puts out a lovely "french fry" crimp and nice soft wool. The Shetland adds its own wonderful qualities as described above helping to curb some of the felting that can happen with BFL and keep the fiber a nice length. Combined the wool from these sheep was easy to wash, card and practically spun itself. While purebred sheep breeds are wonderful to spin and more predictable in fiber type, keep an eye out for interesting cross breeds as well! Interested in spinning any of these fibers? I process loads of U.S. grown wool through my wool mill. I take my time to be able to produce lovely fibers that make handspinning a dream. To shop Ewethful processed fibers head to my online shop... 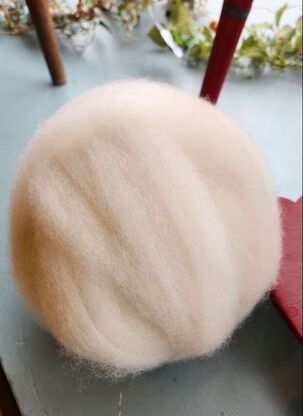 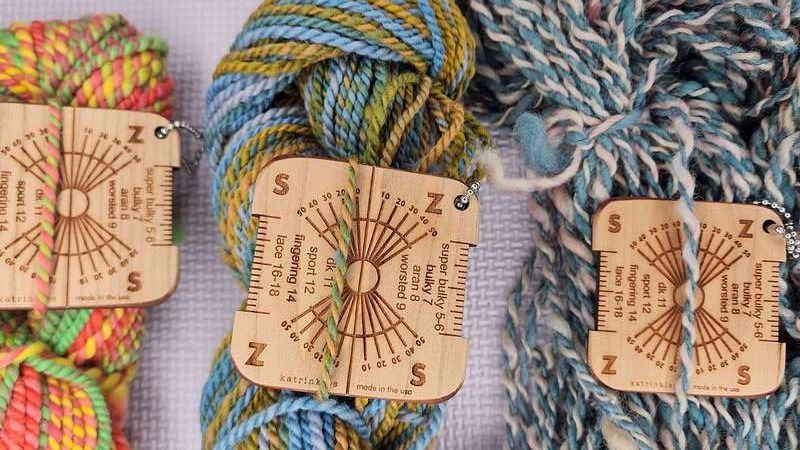 Above samples are using a Yarn Twist degree gauge to look at samples. At some point after you learn to hand spin yarn singles, you will decide it's time to ply those singles together. Plying singles together strengthens your yarn as well as increases the weight of our yarn. I know plying can seem a little intimidating as a beginner because you don't want to mess up that lovely single you worked so hard to spin. Don't be afraid! Plying is the end game and should be fun!
Here are a few tips I have taken from my students questions to help make plying a bit easier for you.
Starting in March I will be adding live Q & A spinning sessions available to my Patreon members. This will be available at the $5 level. These sessions will be available via Zoom. You will be invited to come on in and ask questions that have you stumped with your spinning. I won't be teaching spinning on the Zoom (I have a course for that! - Let's Make Yarn!) My goal is to make myself available to troubleshoot hand spinning issues for those new to the craft or are just feeling frustrated. Join the Ewethful Patreon community now or be sure to get signed up for my newsletter to stay up to date! You can join the newsletter on my website ewethfulfiberfarm.com Owning a wool mill means I do a lot of washing raw wool, also know as scouring. I wanted to share some of my top tips for washing wool which you can use at home. Hand processing wool can be time consuming and has a bit of a learning curve but once you get a routine it is a lovely way to process a fleece right from the beginner. Here are some of my top wool washing tips I have learned over the years.
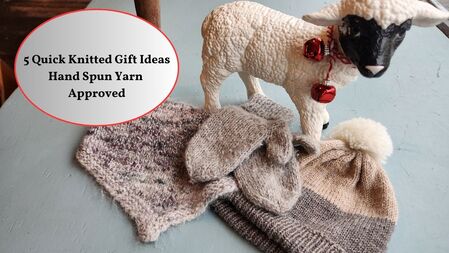 Is the holiday season here and you just realized you haven't planned out your holiday gift knitting projects? Well I have you covered here as I share with you some of my favorite and quick to knit patterns - all hand spun yarn approved!
A lovely cowl with a unique design using worsted weight yarn. Arbutus by Jane Richmond https://www.ravelry.com/patterns/library/arbutus Your basic warm wooly mittens that are perfect to knit with hand spun yarn. Oma Lenis Chunky Mitts by Gralina Frie https://www.ravelry.com/patterns/library/oma-lenis-chunky-mittens Who doesn't love a good bag? I knit this up years ago and keep meaning to go back for more! Booga Bag by Julie Anderson https://www.ravelry.com/patterns/library/booga-bag My all-time favorite beanie, simple in design but so much room to play and the perfect fit! Conversationalist by Plucky Knitter Design https://www.ravelry.com/patterns/library/conversationalist This is the first project I used my own hand spun yarns with and it is my "go-to" winter cowl. Bandana Cowl by Purl Soho https://www.ravelry.com/patterns/library/bandana-cowl This shawlette can easily be done in different yarn weights and still have a simple delicate look. Wendy's Favorite Shawlette https://www.ravelry.com/patterns/library/wendys-favorite-shawlette If you'd like to see these patterns knit up head to my YouTube channel, All About Wool, where I talk about and show examples of each of these patterns. Link to this episode I would love to hear about some of your favorite quick to knit patterns and gift ideas so comment below! Have you been watching others hand spin and been enamored with the calm and ease they seem to exude? Maybe this has got you thinking that learning to hand spin seems amazing but where do you start? Trust me I have been there. It seems like there are so many words, fibers, tools and that doesn't even touch on the spinning wheel or how it works. Well, I am here to help put you at ease! I believe that understanding your wheel, starting with the right fiber for beginners, and having a good teacher are all you need to have an easier transition to becoming a hand spinner. There will be a learning curve of course, but if you are willing to commit just 10 minutes a day to practice, you can get there! I am hosting some live FREE webinars starting on October 24th 2023 to help you start to understand some of the basics as well as the simplicity of making yarn and the joys that come with it. You do need to sign up in advance so follow the link below to save your spot. I hope to see you there! Let's get you spinning! Sign up for the free webinar here 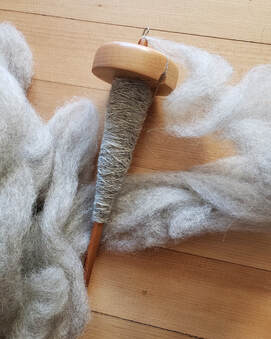 When you first start hand spinning it seems like there are a lot of things going on that you need to manage. When learning to drop spindle handling the tool is one thing while trying to understand and learn to draft the fiber is a whole other component. Trying to do them both at once! Whoa! Park and draft is a technique used when learning that let's you focus on and practice your wool drafting. Looking for a good beginner drop spindle? Check out the Ewethful Fiber website for great top whorl drop spindles and fiber for beginners. Here's how it works: 1. While pinching the fiber so that no twist builds up, give your drop spindle a good twirl and let it go until it is about to stop spinning. 2. Now use your legs to "park" the spindle. Now that the spindle isn't moving you can focus on the fiber. 3. Draft a little fiber with one hand while still keeping the fiber pinched with your other hand. 4. Now release the pinch you have on the fiber and let the twist travel up the fiber. Pinch at the top of the fiber once the twist travel is just about done. 5. Rinse and repeat. As you get more comfortable with drafting you can start to ease back into working your spindle and fiber at the same time. Remember to commit to practicing! 10 minutes a day and you will make quick progress. Check out the Ewethful Fiber Mill website for online classes, drop spindles and easy to spin wool and fibers.
ewethfulfiberfarm.com 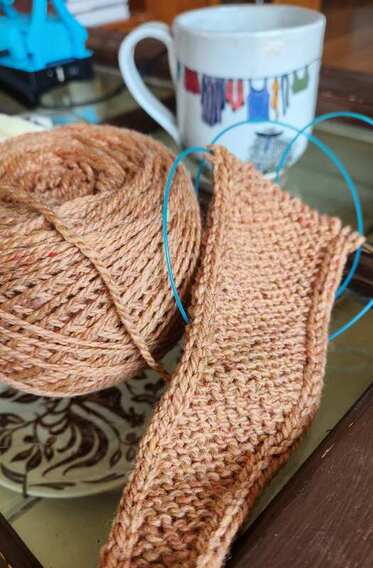  I just had to cast-on the Sophie Scarf by PetiteKnits this week and after deciding to change my needle size it got me to thinking about drape and how to get the drape of your dreams. We've all been there, worked up that project we thought we were going to love only to have the finished item not look quite like the pattern picture. Often times when we picked out our yarn we didn't take into account how that yarn would drape. So here are my 2 tips for dreamy drape:
Head to my website to join my email list for more great tips and to shop local yarns and hand spinning fibers. ewethfulfiberfarm.com 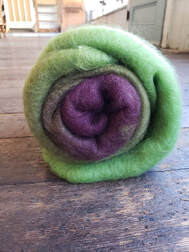 Fun With Batts! Wool batts that is! I've had a lot of handspinners over the years mention to me that they have never spun from a batt and are intimidated by them. So I thought I would do a little step-by-step for those of you who are interested but haven't taken the dive yet. Step 1: Unroll/unfold your batt. Please note, not all batts are packaged the same, but I think the majority of batts you purchase will likely be rolled in some form for ease of packaging.  Step 2: Stripping Batts. I generally strip my batts as I go along so I don't have to hold a big old batt. This is simple! Just pull a chunk and "go with the grain" of the fiber as you pull. You can make this strip as thick or as thin as you want - and your strips do not all need to be the same thickness so do not worry too much as you strip. Depending on the density of the fiber you may want to pre-draft the strip a little for ease of spinning. Totally up to you! 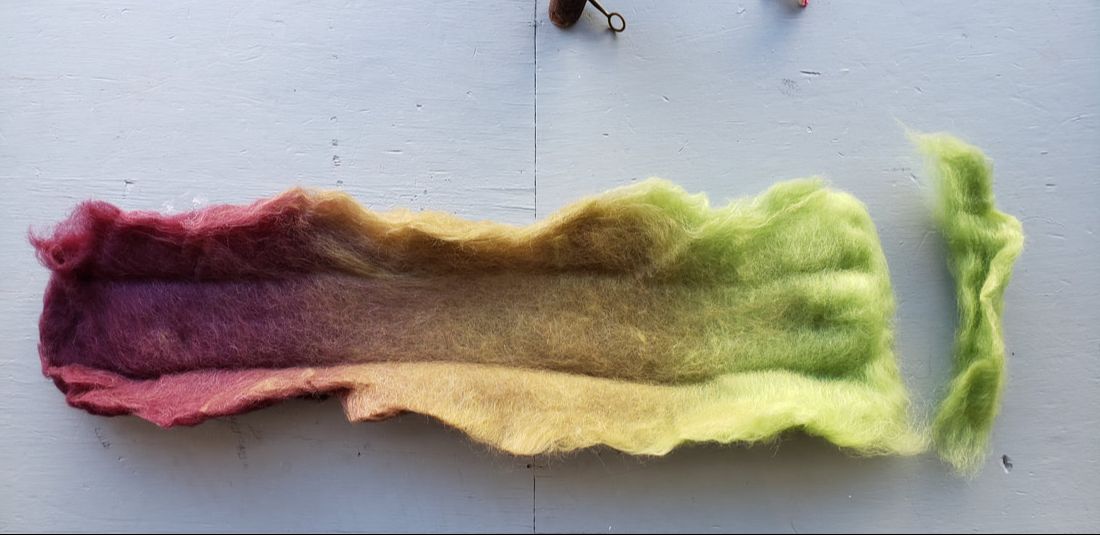 Step 3: Deciding how to spin - shorter or long color changes. Now you have options! Spinning for long color changes. You could choose to spin directly across the batt and follow the colors as they change. The will give you 3 very long stretches of the colors in your yarn, For this batt you would go light green to olive green to the wine color (or you could of course start on the wine side). Spinning this batt in this style would give you long runs of each color. Spinning for shorter color changes. Another option is to split the colors up and spin them back and forth - small strip of light green, then olive green, then wine and back to light green and so on. Spinning in this way will cause more frequent color changes throughout your yarn. If you choose this route, you will want to split the batt into the three different colors and then pull strips from each as you go. You can come up with any combination you'd like! This is your yarn! 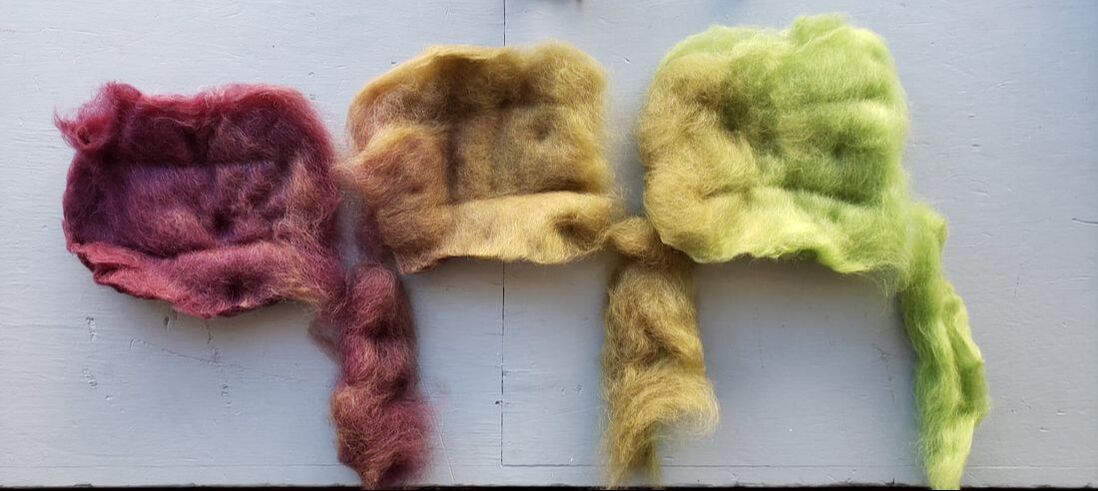 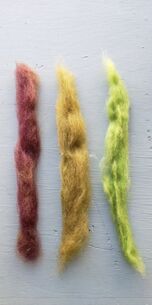 Again, depending on the density of the fiber you may want to pre-draft the strips a little for ease of spinning.
That is two fun ways to spin this batt. And of course there are different ways you could ply that would allow for all different types of color patterns in your finished yarn. I hope this helped a few of you feel a new inspiration towards spinning batts! If you are looking for some lovely batts to spin be sure to check out my online shop for hand spinning fun. ewethfulfiberfarm.com |
AuthorI am Kim Biegler, the owner and operator of Ewethful Fiber Farm & Mill. I create hand spinning fibers from locally sourced wool and teach others online how to hand spin their own yarn. Archives
August 2023
Categories |
 RSS Feed